


As a supplier of eddy current flaw detectors, I understand the critical importance of sensitivity calibration in ensuring the accurate and reliable detection of flaws. Eddy current flaw detectors are widely used in various industries, including aerospace, automotive, and manufacturing, to detect surface and near-surface flaws in conductive materials. In this blog post, I will share my expertise on how to perform a sensitivity calibration of an eddy current flaw detector.
Understanding Sensitivity Calibration
Sensitivity calibration is the process of adjusting the eddy current flaw detector to ensure that it can detect flaws of a specific size and type with a high degree of accuracy. The sensitivity of an eddy current flaw detector is determined by several factors, including the type of probe used, the frequency of the eddy current, and the gain setting of the detector. By calibrating the sensitivity of the detector, you can ensure that it can detect flaws of a specific size and type, even in challenging environments.
Preparing for Sensitivity Calibration
Before you begin the sensitivity calibration process, it is important to prepare the eddy current flaw detector and the test specimen. Here are the steps you should follow:
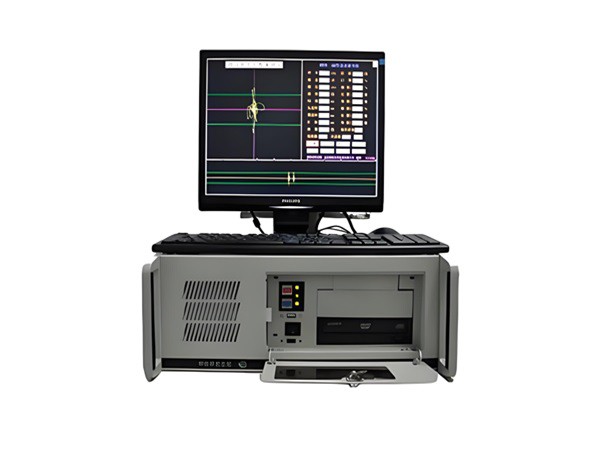
- Select the appropriate probe: The type of probe you use will depend on the size and shape of the test specimen, as well as the type of flaw you are trying to detect. Make sure to select a probe that is compatible with the eddy current flaw detector and the test specimen.
- Clean the test specimen: The test specimen should be clean and free of any dirt, oil, or other contaminants that could affect the accuracy of the eddy current testing. Use a clean, dry cloth to wipe the surface of the test specimen before testing.
- Set the frequency and gain: The frequency and gain settings of the eddy current flaw detector will depend on the type of probe used and the size and type of flaw you are trying to detect. Consult the manufacturer's instructions for the recommended frequency and gain settings for your specific application.
- Establish a reference standard: A reference standard is a test specimen with known flaws of a specific size and type. The reference standard should be made of the same material as the test specimen and should have flaws that are similar in size and shape to the flaws you are trying to detect. Use the reference standard to establish the sensitivity of the eddy current flaw detector.
Performing Sensitivity Calibration
Once you have prepared the eddy current flaw detector and the test specimen, you can begin the sensitivity calibration process. Here are the steps you should follow:
- Place the probe on the reference standard: Place the probe on the reference standard at the location of the known flaw. Make sure the probe is centered over the flaw and that there is good contact between the probe and the surface of the reference standard.
- Adjust the gain setting: Slowly increase the gain setting of the eddy current flaw detector until the flaw signal is clearly visible on the display. The gain setting should be adjusted so that the flaw signal is at least 80% of the full scale deflection of the display.
- Mark the sensitivity level: Once the gain setting has been adjusted, mark the sensitivity level on the eddy current flaw detector. This will allow you to reproduce the same sensitivity level for future tests.
- Verify the sensitivity calibration: To verify the sensitivity calibration, test the eddy current flaw detector on the reference standard at several different locations. Make sure the flaw signal is consistent and that the sensitivity level is the same at all locations.
- Test the test specimen: Once the sensitivity calibration has been verified, test the eddy current flaw detector on the test specimen. Move the probe slowly over the surface of the test specimen, looking for any indications of flaws. If a flaw is detected, mark the location of the flaw on the test specimen and record the size and type of the flaw.
Troubleshooting Sensitivity Calibration Issues
If you encounter any issues during the sensitivity calibration process, here are some troubleshooting tips:
- Check the probe: Make sure the probe is clean and free of any damage. If the probe is damaged, replace it with a new one.
- Check the test specimen: Make sure the test specimen is clean and free of any contaminants. If the test specimen is dirty or contaminated, clean it before testing.
- Check the frequency and gain settings: Make sure the frequency and gain settings of the eddy current flaw detector are correct. If the settings are incorrect, adjust them according to the manufacturer's instructions.
- Check the reference standard: Make sure the reference standard is made of the same material as the test specimen and that the flaws are similar in size and shape to the flaws you are trying to detect. If the reference standard is not appropriate, use a different reference standard.
Conclusion
Performing a sensitivity calibration of an eddy current flaw detector is a critical step in ensuring the accurate and reliable detection of flaws. By following the steps outlined in this blog post, you can calibrate the sensitivity of your eddy current flaw detector and ensure that it can detect flaws of a specific size and type with a high degree of accuracy. If you have any questions or need further assistance with sensitivity calibration, please contact us at [contact information]. We are a leading supplier of Steel Tube Eddy Current Flaw Detector and other non-destructive testing equipment, and we are committed to providing our customers with the highest quality products and services.
References
- ASNT (American Society for Nondestructive Testing). Eddy Current Testing Handbook.
- ISO (International Organization for Standardization). ISO 15548: Non-destructive testing - Eddy current testing equipment.